| “This site contains affiliate links for which OEMDTC may be compensated” |
TECHNICAL BULLETIN
JTB00365NAS2 – JTB00365NAS1
03 FEB 2015
SECTION: 309-00
Active Exhaust Vacuum Pump Noisy
AFFECTED VEHICLE RANGE:
F-TYPE (X152)
Model Year: 2014 Onwards
VIN: K00001 Onwards
MARKETS:
All
CONDITION SUMMARY:
Situation: A buzzing noise coming from the rear left of the vehicle may be evident, occurring predominantly at low speeds.
Cause: This may be caused by the orientation of the Active Exhaust vacuum pump against the vehicle body, which amplifies the pump vibrations.
Action: Should a customer express this concern, follow the appropriate Service Instruction [A or B] outlined below.
PARTS:
NOTE: Cable ties to be sourced locally.
| T2R16886 | Vacuum pipe | Quantity: 1 |
| Cable tie (100mm x 2.5mm) | Quantity: 10 | |
| Cable tie (165mm x 4.6mm) | Quantity: 2 |
TOOLS:
Refer to Workshop Manual for any required special tools.
WARRANTY:
NOTE: Repair procedures are under constant review, and therefore times are subject to change; those quoted here must be taken as guidance only. Alwat refer to TOPIx to obtain the latest repair time.
NOTE: DDW requires the use of causal part numbers. Labor only claims must show the causal part number with a quantity of zero.
| DESCRIPTION | SRO | TIME (HOURS) | CONDITION CODE | CAUSAL PART | ||
| Active Exhaust vacuum pump – Remove and discard – 3.0L SC V6 | 30.91.09 | 0.8 | 42 | T2R13554 | ||
| Active Exhaust vacuum pump – Remove and discard – 5.0L SC V8 | 30.91.09 | 1.0 | 42 | T2R13554 | ||
NOTE: Normal Warranty procedures apply.
SERVICE INSTRUCTION A
SERVICE INSTRUCTION A: 3.0L SC V6 ONLY
NOTE: Some components shown removed for clarity.
- Remove the engine cover (see TOPIx Workshop Manual, section 501-05).
- WARNING: Make sure to support the vehicle with axle stands.
Raise and support the vehicle.
- Remove the rear left wheel and tire (see TOPIx Workshop Manual, section 204-04).
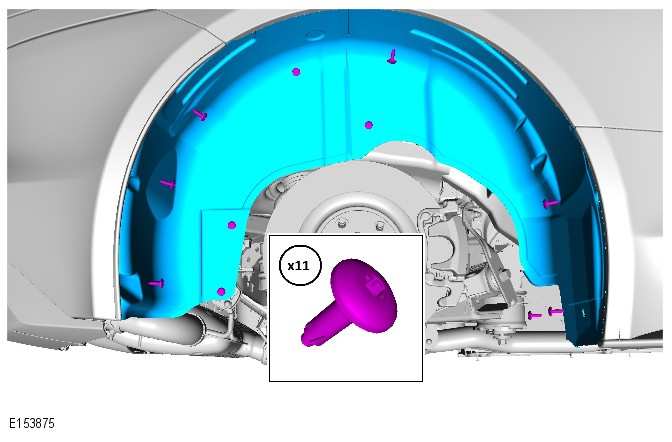
- NOTE: Right-side shown; left-side similar.
Remove the rear left fender splash shield.
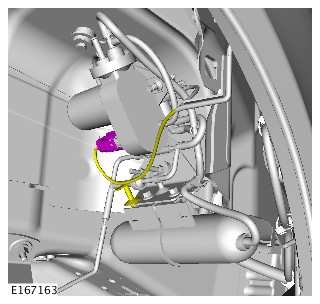
- Disconnect the Active Exhaust vacuum pump electrical connector.
- Remove and discard the Active Exhaust vacuum pump wiring.
- Insulate the bumper harness with insulation tape.
- NOTE: Do not discard this hose; it is re-used in the next step.
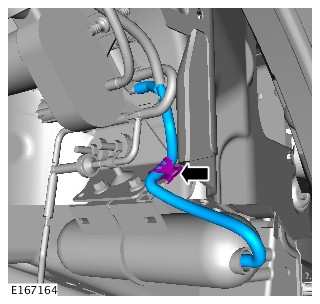
Remove the Active Exhaust vacuum pump hose and T-piece.
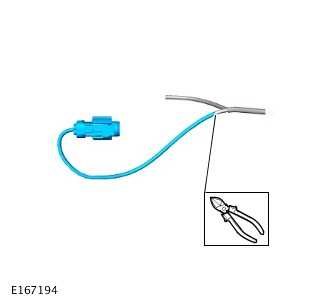
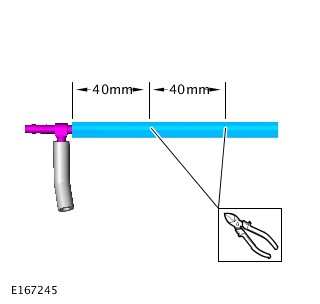
- Using the hose and T-piece removed in the previous step, measure and cut the hose as shown to make a connecting T-piece.
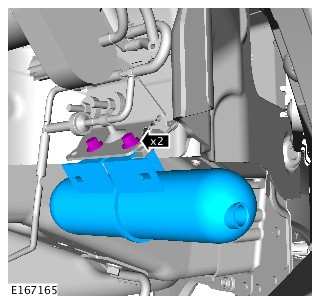
- Remove the retaining bolts and discard the Active Exhaust pump vacuum reservoir.
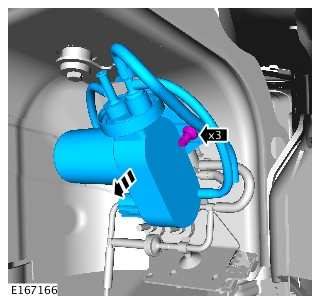
- Remove and discard the Active Exhaust vacuum pump from its rubber retaining mountings.
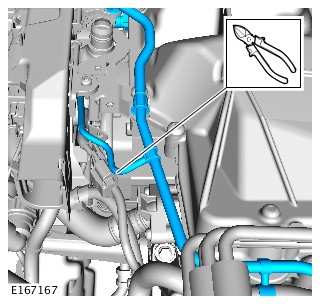
- WARNING: Cut the vacuum pipe only at the point shown. Failure to comply with this may result in loss of brake servo assistance if the vacuum pipe becomes disconnected.
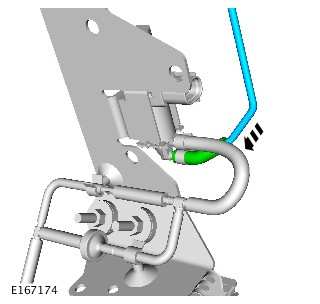
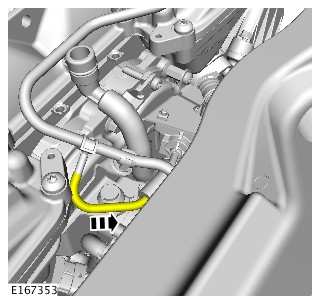
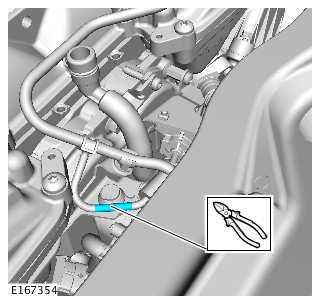
In the engine compartment, locate the vacuum pipe and cut at the point shown.
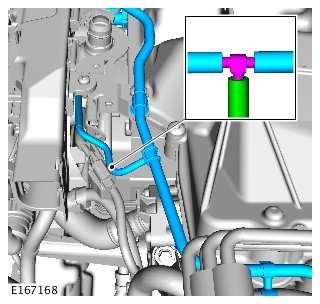
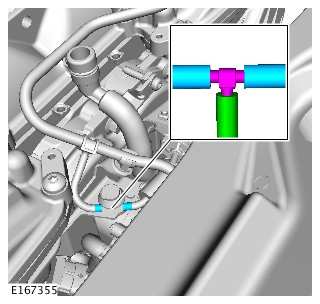
- Install the T-piece from step 8 into the vacuum pipe.
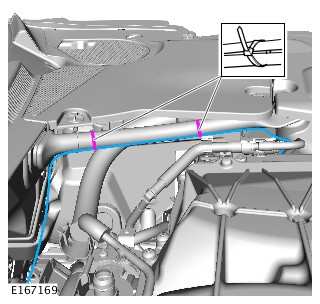
- Install the vacuum pipe around the engine compartment and secure to the brace bar with the 165mm x 4.6mm cable ties.
- Install the vacuum pipe into the T-piece installed in step 12.
- Install the engine cover (see TOPIx Workshop Manual, section 501-05).
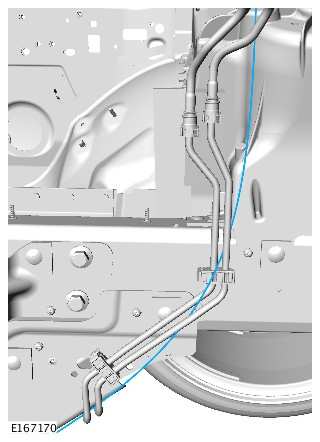
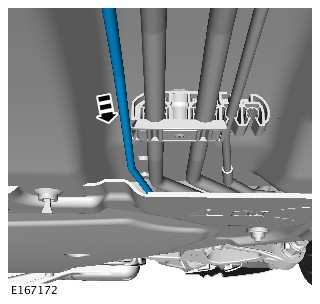
- Install the vacuum pipe along the fuel lines.
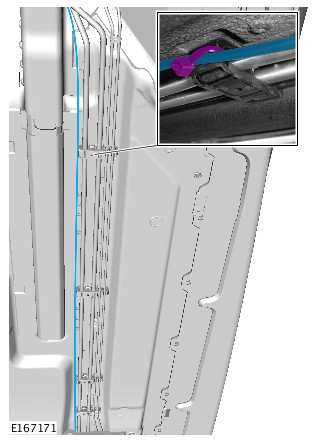
- Install the vacuum pipe along the underside of the vehicle. Secure the pipe to the fuel line fixings with the 100mm x 2.5mm cable ties.
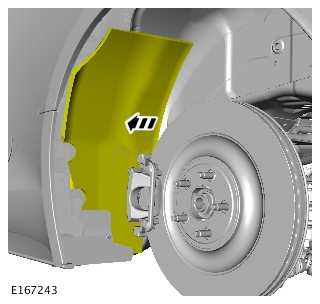
- Position the noise, vibration, and harshness (NVH) pad to one side.
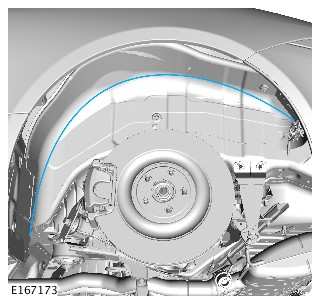
- Install the vacuum pipe in the rear left wheel arch.
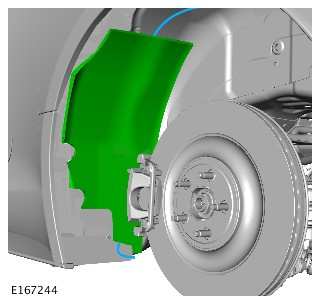
- Install the NVH pad over the vacuum pipe.
- Install the vacuum pipe into the vacuum hose on the Active Exhaust operating valve.
- Install the rear left wheel and tire assembly (see TOPIx Workshop Manual, section 204-04).
- Lower the vehicle.
SERVICE INSTRUCTION B
SERVICE INSTRUCTION B: 5.0L SC V8 ONLY
NOTE: Some components shown removed for clarity.
- Remove the engine cover (see TOPIx Workshop Manual, section 501-05).
- WARNING: Make sure to support the vehicle with axle stands.
Raise and support the vehicle.
- Remove the rear left wheel and tire (see TOPIx Workshop Manual, section 204-04).
- NOTE: Right-side shown; left-side similar.
Remove the rear left fender splash shield.
- Disconnect the Active Exhaust vacuum pump electrical connector.
- Remove and discard the Active Exhaust vacuum pump wiring. Insulate the bumper harness with insulation tape.
- Insulate the bumper harness with insulation tape.
- NOTE: Do not discard this hose; it is re-used in step 8.
Remove the Active Exhaust vacuum pump hose and T-piece.
- Using the hose and T-piece removed in step 7, measure and cut the hose as shown to make a connecting T-piece.
- Remove the retaining bolts and discard the Active Exhaust pump vacuum reservoir.
- Remove and discard the Active Exhaust vacuum pump from its rubber retaining mountings.
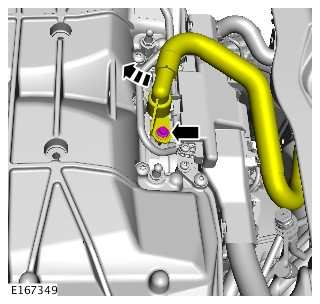
- In the engine compartment, remove the retaining bolt and position the symposer air pipe to one side.
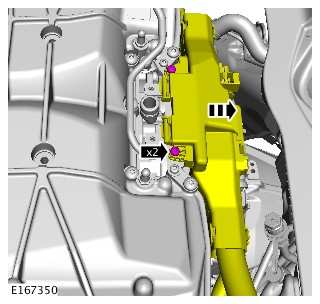
- Remove the retaining bolts and position the engine compartment wiring harness to one side.
- Disconnect the vacuum pipe and position to one side.
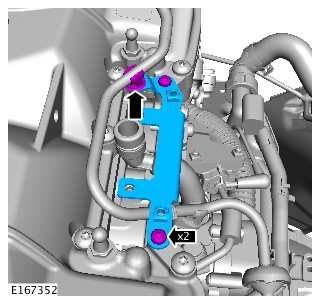
- Remove the retaining bolts and pipe retaining clip.
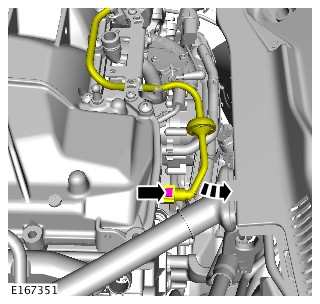
- Remove the engine compartment wiring harness support bracket.
- Position the vacuum pipe heat shield to one side.
- WARNING: Cut the vacuum pipe only at the point shown. Failure to comply with this may result in loss of brake servo assistance if the vacuum pipe becomes disconnected.
Locate the vacuum pipe and cut at the point shown.
- Install the T-piece from step 8 into the vacuum pipe.
- Install the vacuum pipe around the engine compartment and secure to the brace bar with the 165mm x 4.6mm cable ties.
- Install the vacuum pipe into the T-piece installed in step 17.
- Install the vacuum pipe along the fuel lines.
- Install the vacuum pipe along the underside of the vehicle. Secure the pipe to the fuel line fixings with the 100mm x 2.5mm cable ties.
- Position the noise, vibration, and harshness (NVH) pad to one side.
- Install the vacuum pipe in the rear left wheel arch.
- Install the NVH pad over the vacuum pipe.
- Install the vacuum pipe into the vacuum hose on the Active Exhaust operating valve.
- Reverse steps 11-15.
- Install the engine cover (see TOPIx Workshop Manual, section 501-05).
- Install the rear left wheel and tire assembly (see TOPIx Workshop Manual, section 204-04).
- Lower the vehicle.
 Loading...
